Route Restructures - The Route Restructure tool gives you the ability to restructure your routes using various filters and parameters. From the Route Planning menu select Route Restructure.
The process has 8 basic steps:
1. Choose the scope of your restructure (what subscribers will be included).
2. Choose the parameters for your new routes (how large will the routes be).
3. Choose the start and end points for your routes (where will the carriers leave from and where will they finish).
4. Run the process.
5. Review your results.
6. Create a new WAD based on your results.
7. Test your new WAD.
8. Assign your new WAD to be used in your production run.
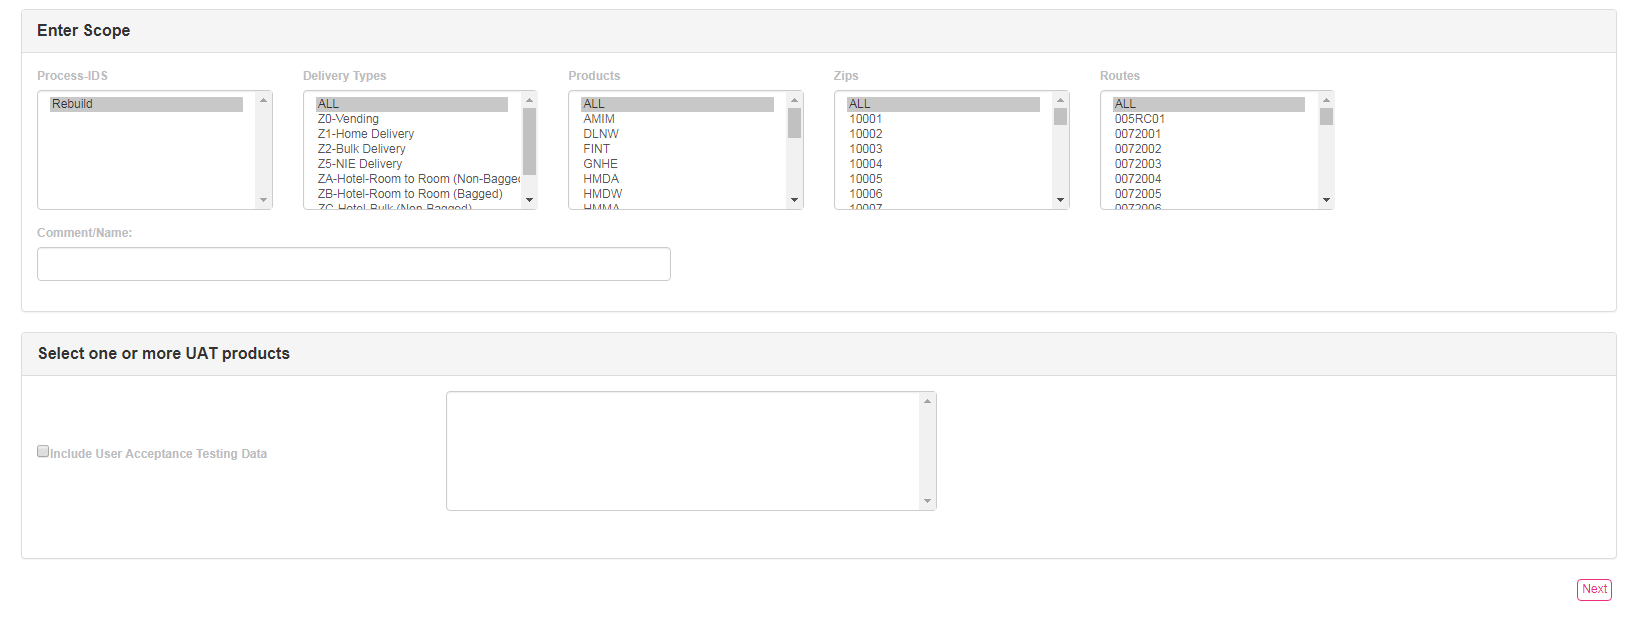
Choosing your scope:
Here you will answer these questions:
1. What do I want to restructure?
2. Do I want my restructure to be based on certain delivery types?
3. Do I want my new routes to be based only on certain products?
4. Do I want my restructure to be based on certain ZIP codes?
5. Do I want my restructure based on a certain set of existing routes?
6. Do I want to include new subscriber test data in my new routes?
Using the controls:
1. Select the Process ID with which to start (most times this is “Rebuild”).
2. Select a specific Delivery Type(s) if needed. This choice will filter out unselected options and NOT include them in your solution.
3. Select a specific Product(s). This choice will filter out unselected options and NOT include them in your solution.
4. Select a specific ZIP(s). This choice will filter out unselected options and NOT include them in your solution.
5. Select a specific Route(s). This choice will filter out unselected options and NOT include them in your solution.
6. Choose to include UAT test data in your solution (e.g. preparing for a new product launch).
The selection boxes here will allow you to filter your existing subscriber data to get down to the subscriber set you want to restructure. Keep in mind that all 4 of the filters work together, so if you choose a specific delivery type and a specific product, the system will only look for subscribers that have BOTH the delivery type AND product you’ve selected.
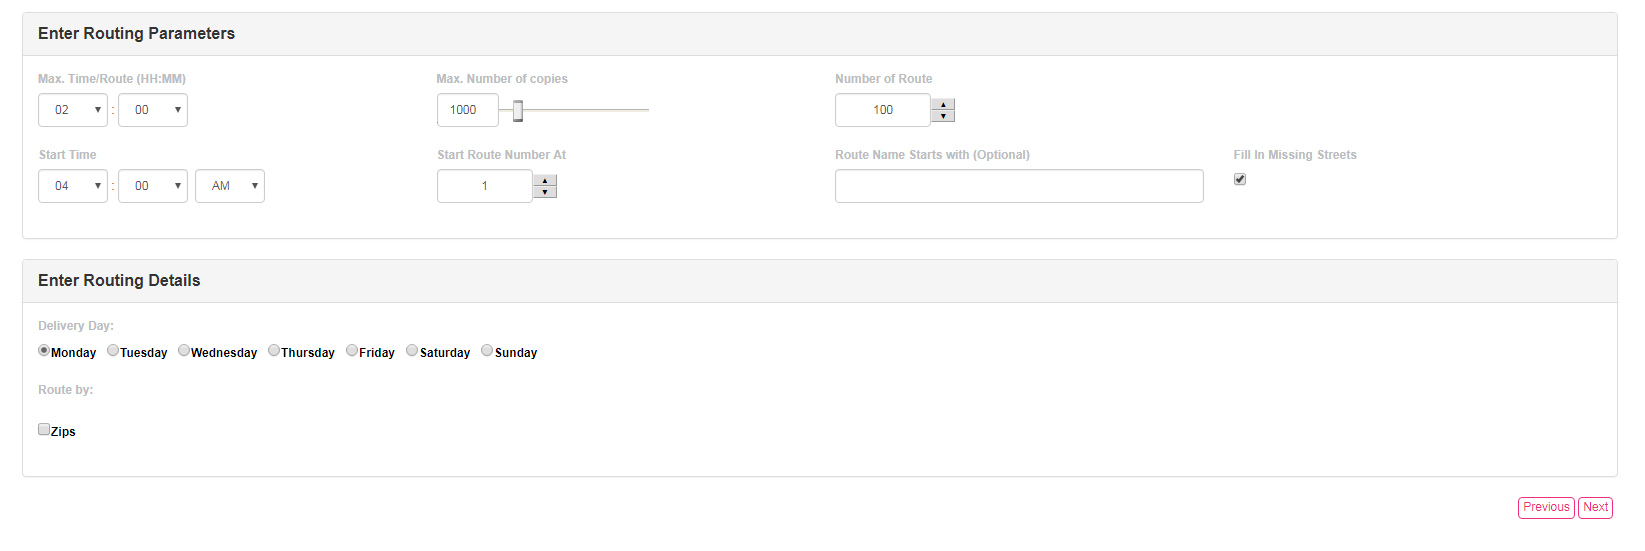
Setting your parameters:
Here you will answer these questions:
1. How large can my routes be?
2. Do I want my route size to be based on time?
3. Do I want my route size to be based on draw?
4. Do I want my route size to be based on a desired number of routes?
5. Do I want my route size to be based on a combination of those things?
6. How do I want my routes numbered?
7. Do I want my routes to be ZIP code pure?
8. What day of the week do I want my restructure based upon?
In general, basing the routes on time ONLY will give you the most condensed, even routes.
Setting your route start point and end point:
Here you will answer these questions:
1. Where will my routes start?
2. Where will my routes end?
3. Do I need to add a temporary start/end location?
Using the controls:
1. Select the start point for the routes.
2. Select the end point for the routes.
3. If you’re testing a potential new start/end point, you can enter a temporary one here to be used for this run.
Most of the time, the end point should be “Last SL Delivered”. This means that there is no specific point which you want the routes to end near. You simply want them to be as efficient as possible.

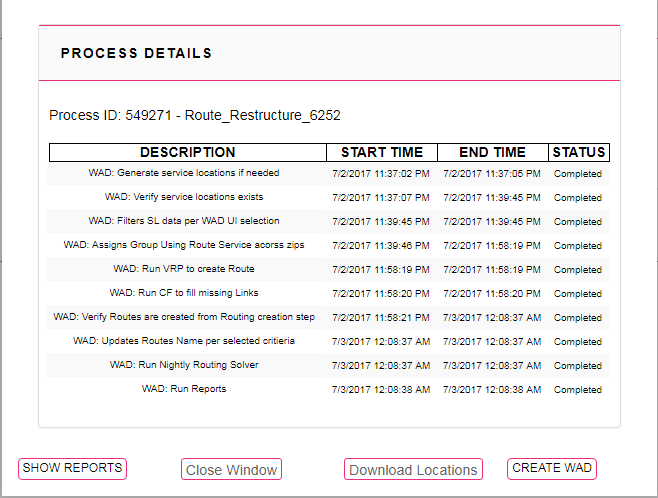
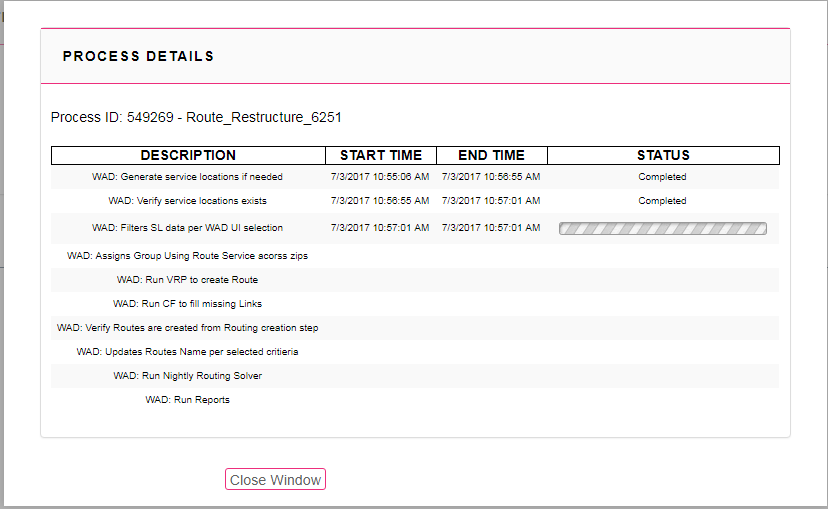
Reviewing your results:
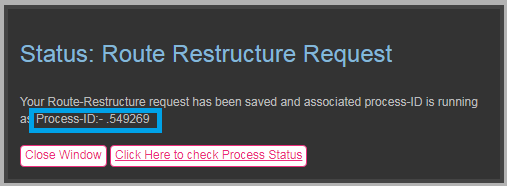
When you initiate the run you’ll see the progress monitor. Take note of the Process ID number as you will need to know this when you view your results on other screens.
When the process is complete, the remaining buttons will become active.
At this point you can view your reports, close the process window, download a CSV file with the service locations from your run, or use this run to create a new WAD.
By clicking the Show Reports button, you’ll be taken to the Production Reports screen, AD Hoc tab and your Process ID will be loaded automatically. Here you will be able to view and print the reports that were generated from your run. You can also go to the Route Viewer screen and choose your Process ID to view your new routes on the map.
If you are satisfied with your results, you can now go to the WAD Creation tool and make a new WAD for testing. If you’re not satisfied, you can rerun the process and adjust your parameters. You can make adjustments as often as need to get to the results you’re looking for.