OVERVIEW: The Route Consolidation tool gives you the ability to eliminate a selected route and have the deliveries absorbed by surrounding routes. It also gives you the ability to quickly combine 2 routes together. From the main menu select Route Planning then Route Consolidation.
The process has 5 basic steps:
Choose the routes you want to work with.
Run the consolidation process and review your results.
Create a new WAD based on your results.
Test new WAD to validate results.
Assign new WAD for production processing.
Choosing your routes: Here you will answer these questions:
Which route do I want to eliminate?
Which routes do I want to receive copies from the eliminated route?
Using the settings controls:
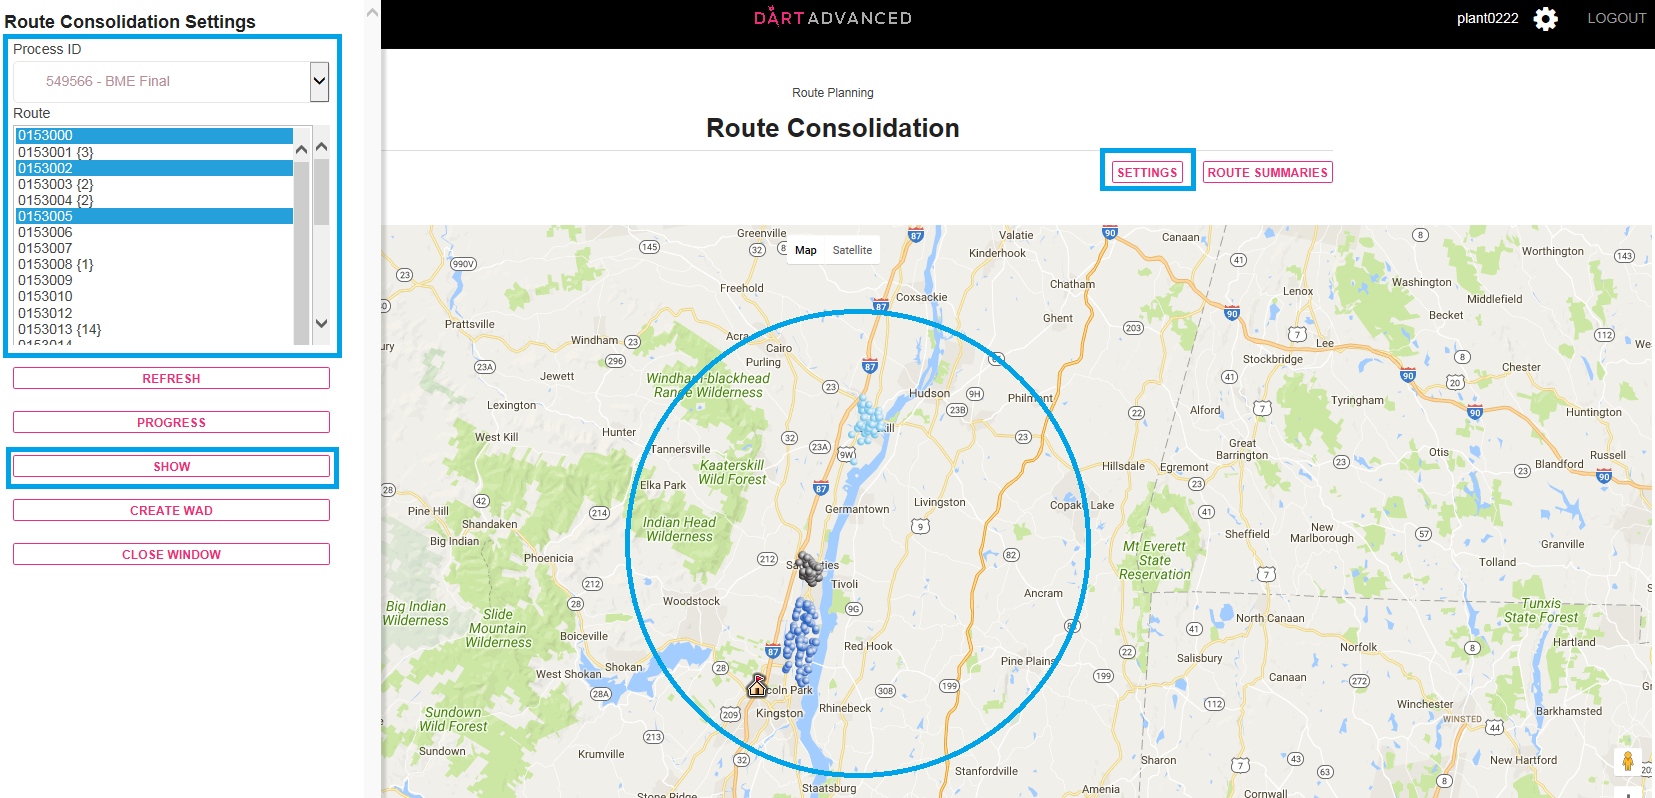
Select your plant and Process ID which is most often your “Final” run and select the routes you want to work with then select SHOW to view routes select on the map.
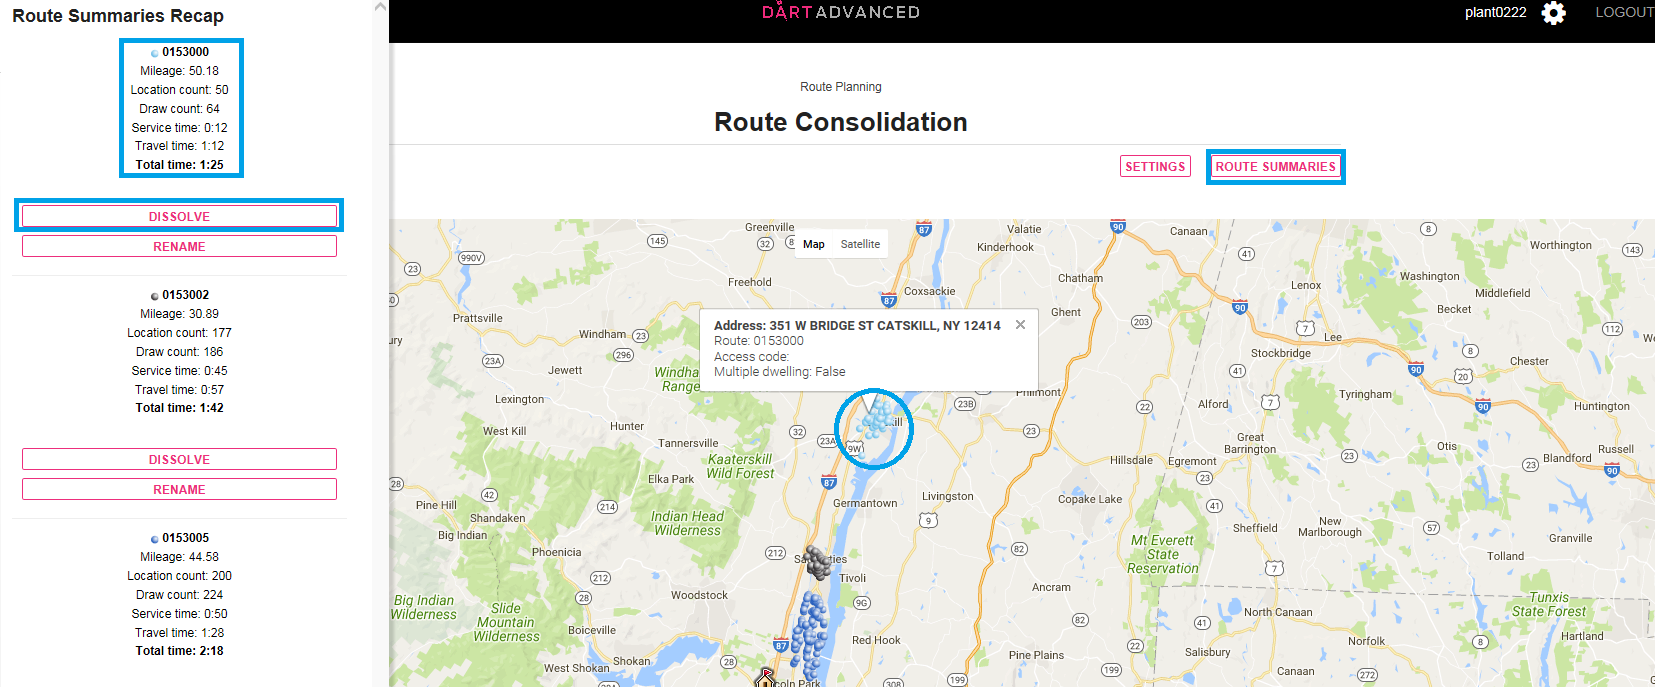
Select Route Summaries to view route details. The route summaries button gives you data about the routes (Time, miles, location count) displayed and which color on the map represents each route. This can help you determine which route to eliminate.
Select Rename to change existing route selected or use Dissolve to eliminate route into surrounding routes. The Rename button allows you to quickly rename a route to merge it with another existing route. The Dissolve button starts the process to dissolve an existing route into the other selected routes.
Select Proceed if you are sure this is the route you want to dissolve otherwise select “x” to exit window and start again. The Progress button will show what stage of your selected Process ID.
To view most recent consolidation reselect the process ID in the Route Consolidation Settings or Select process ID in the Route Viewer tool. The Show button will display the selected route on the map. The refresh button clears the screen.
If you are happy with the results select the Create WAD button to create a new WAD.