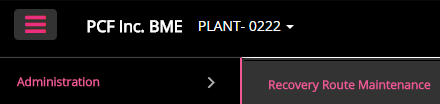
Recoverable complaints can be automatically assigned to recovery routes. To manage these automated assignments, use Recovery Route Maintenance. From the hamburger, choose Administration, then Recovery Route Maintenance.
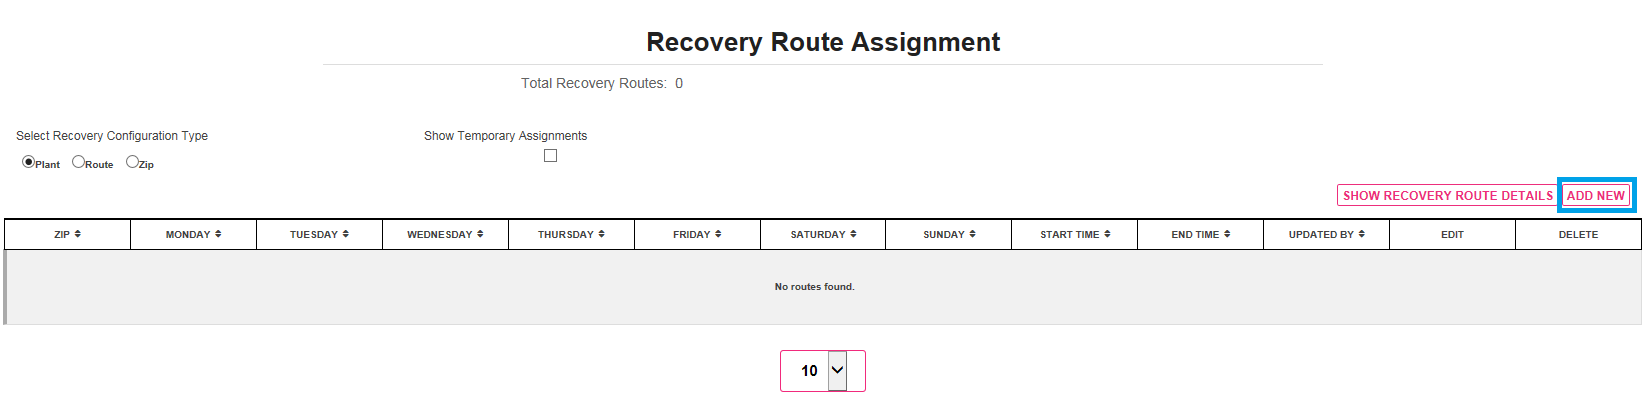
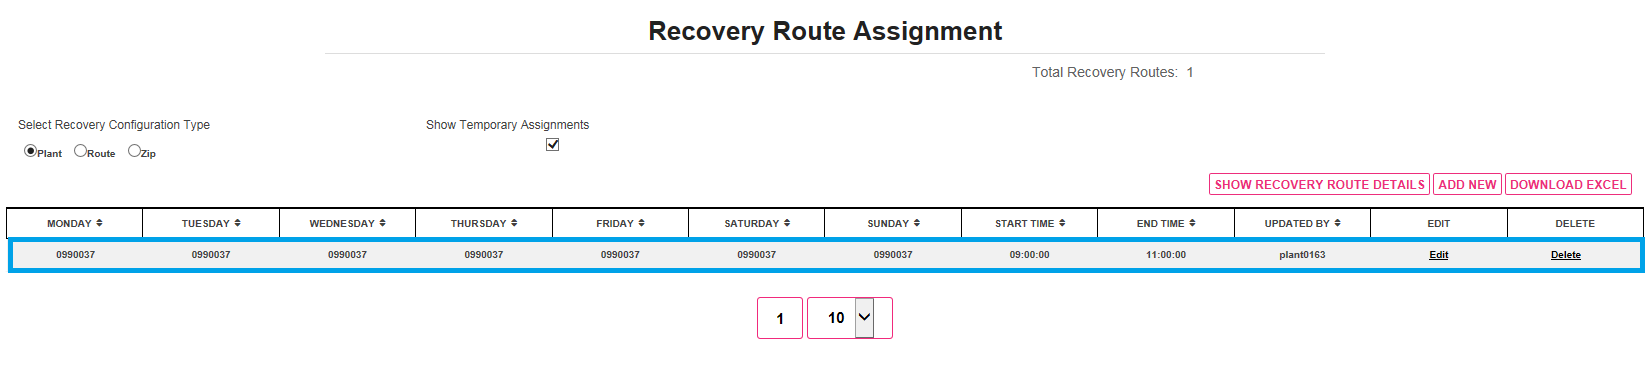
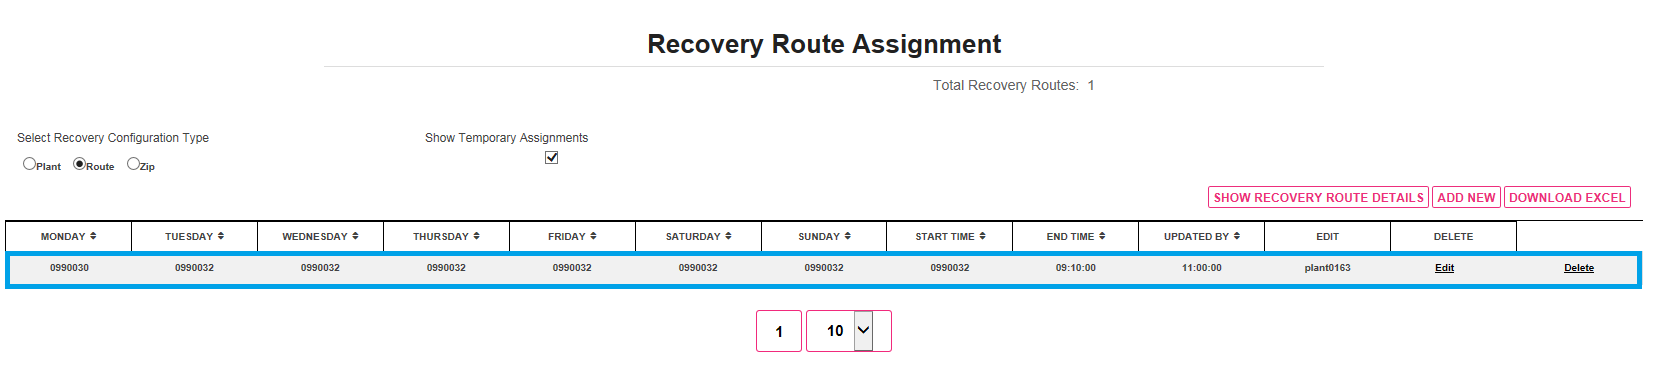
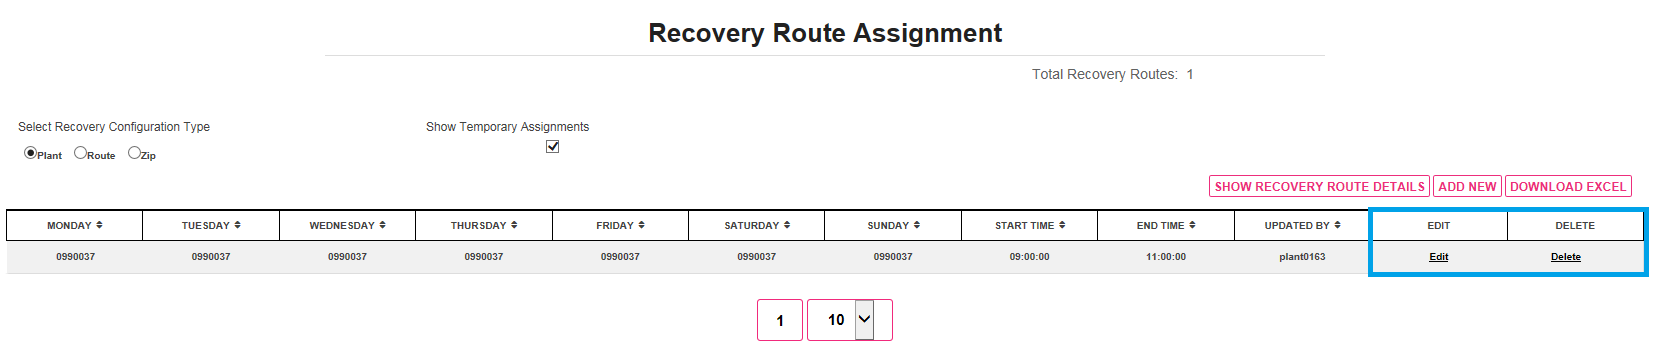
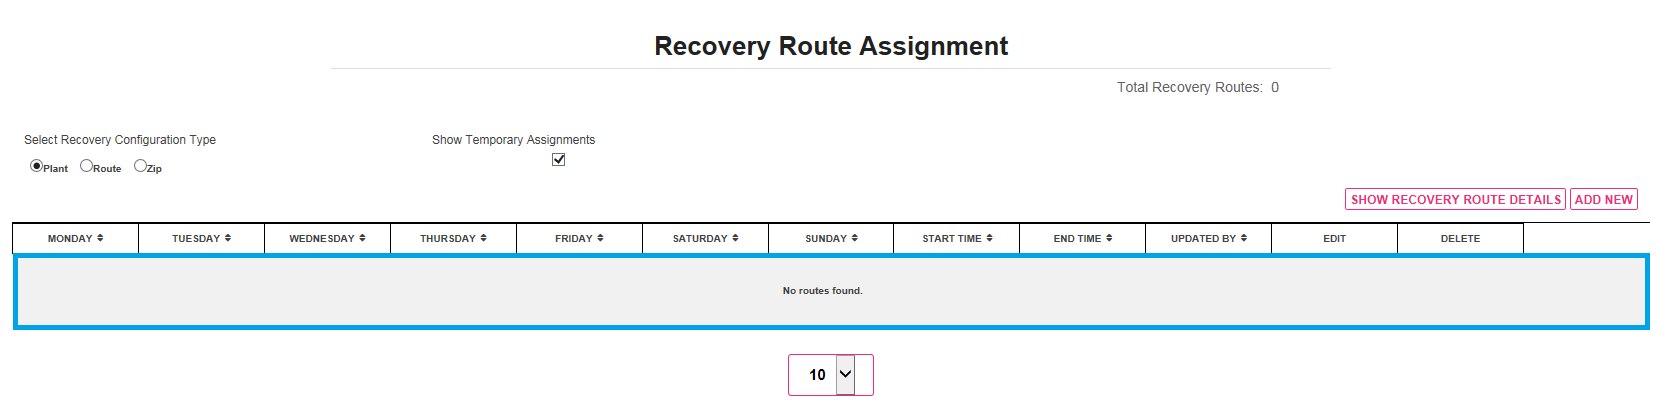
The Recovery Route Assignment screen will display:

In the Select recovery Configuration Type box, choose the type of configuration you want by choosing the appropriate radio button.

The Plant radio button can be used when a single Recovery Route will be responsible for recoveries in the whole plant.
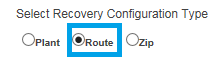
The Route radio button can be used when the recoveries from one or more route(s) will be assigned to a specific recovery route.
The Zip radio button can be used when the recoveries from one or more zip code(s) will be assigned to a specific recovery route.
The most commonly used are by Zip, next would be by Route.
If there are entries in all three categories, this is the hierarchy that applies:
* ZIP entry will override the Route and Plant entries:
* Route entry will override the Plant entries:
* Plant entry will be assigned any entries that have not been designated in either of the other two categories.
If you have assigned temporary routes in the table, you can display them by clicking in the Show Temporary Assignments section.

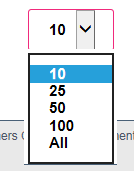
The Page size can be extended. The number of entries will default to 10.
To extend the number of entries displayed on the screen, enter the number to display. 100 is the maximum allowed, then click the Refresh Page Size button.
The screen will then display up to the noted amount of entries.
Click on the Show Recovery Route Details button to display all the configured data chosen.

For the Selection Recovery Configuration Type select Plant.

If you are Adding a new entry, click on Add New.
A new window will open.

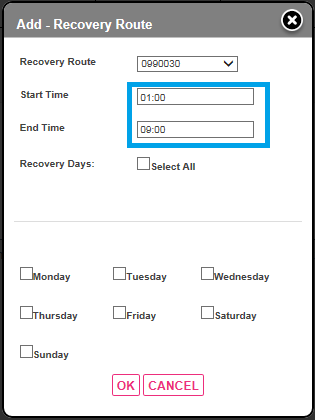
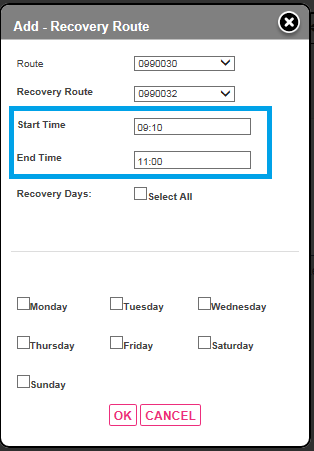
In the Recovery Route field, click on the drop down menu, and choose the route you are adding to be assigned to your Recovery Route.
In this example, since we originally chose the Radio button for plant, your options are to choose the route.
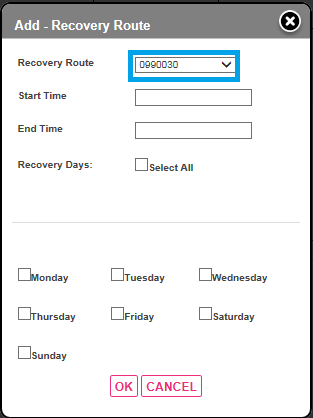
Once the Route is displayed next is to fill in the start and End times for receiving recoverable complaints.
The standard entry times are entered below.
These times indicate the span of time when any recoverable complaint can be received in this plant and applied in the Recovery Route Configuration table.
From 1 AM through 11 AM is the standard time span entered.
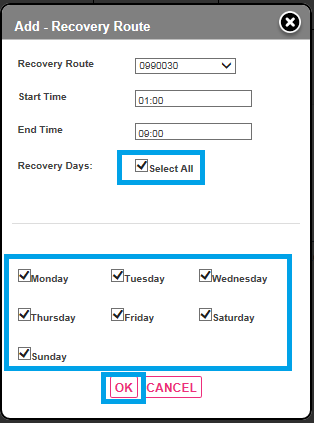
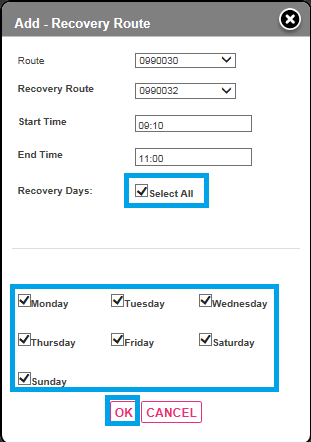
Next, select the days of the week for this new configuration to apply.
You can select all days with one check in Select All box.
Or
Check each specific day(s) that this configuration will apply to.
Below Monday thru Friday have been selected.
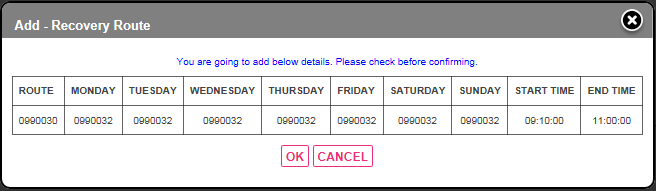
Click OK to save your entry.
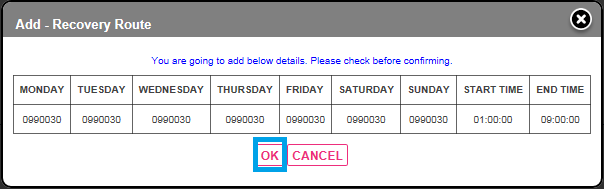
Once saved, you will see a confirmation screen.
If correct, click OK.
If incorrect, you can cancel to re-configure.
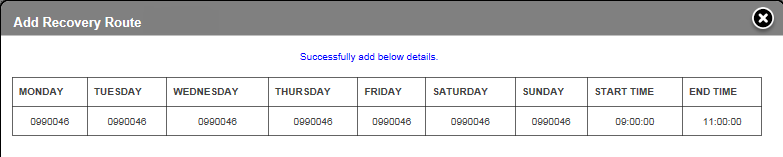
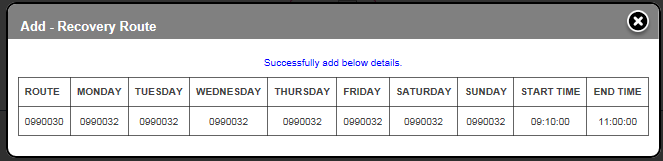
After confirming, you will receive a success message.
You can just Exit once you validate it is correct by clicking on the X.
You will now see the new entry in the configuration display by Plant.
For the Selection Recovery Configuration Type select Route.
If you are Adding a new entry, click on Add New.
A new window will open.
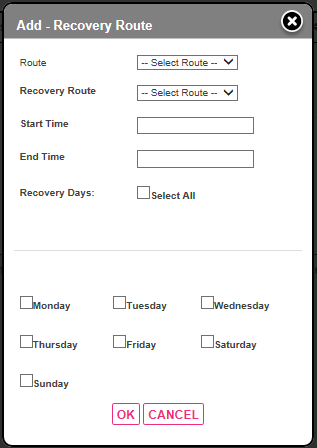
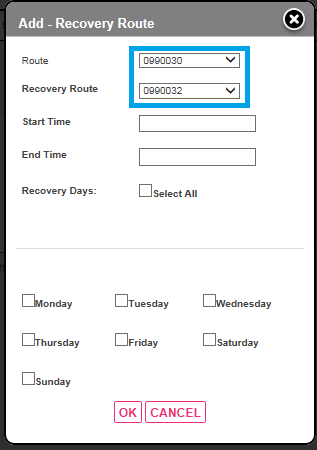
In the Route field, click on the drop down menu, and choose the Route you are adding to be assigned to your Recovery Route.
In this example, since we originally chose the Radio button for Route, your options are to choose the route and then the recovery route.
Once the Routes are displayed next is to fill in the start and End times for receiving recoverable complaints.
The standard entry times are entered below.
These times indicate the span of time when any recoverable complaint can be received in this plant and applied in the Recovery Route Configuration table.
From 1 AM through 11 AM is the standard time span entered.
Next, select the days of the week for this new configuration to apply.
You can select all days with one check in Select All box.
Or
Check each specific day(s) that this configuration will apply to.
Below Monday thru Friday have been selected.
Click OK to save your entry.
Once saved, you will see a confirmation screen.
If correct, click OK.
If incorrect, you can cancel to re configure.
After confirming, you will receive a success message.
You can just Exit once you validate it is correct by clicking on the X.
You will now see the new entry in the configuration display by Route.
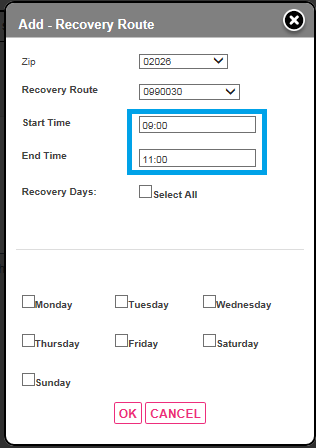
For the Selection Recovery Configuration Type select ZIP.
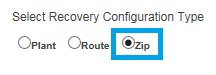
If you are Adding a new entry, click on Add New.
The drop down will display the zip codes to choose from:
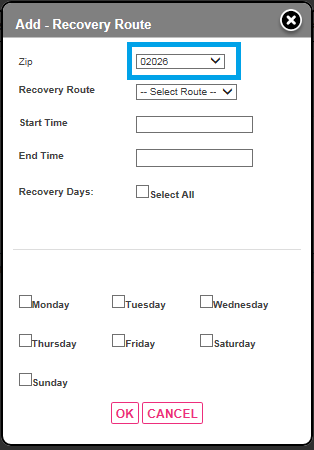
The next step is to choose the recovery route that will be responsible to complete the recoveries in this Zip Code.
Using the drop down menu, choose the recovery route that will be designated to complete the recoveries for this zip code.
All active routes in your plant will be listed.
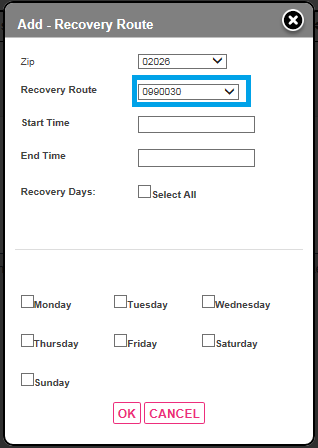
Once the Route is displayed next is to fill in the start and End times for receiving recoverable complaints.
The standard entry times are entered below.
These times indicate the span of time when any recoverable complaint can be received in this plant and applied in the Recovery Route Configuration table.
From 1 AM through 11 AM is the standard time span entered.
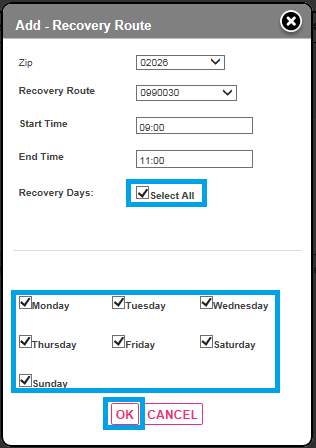
Next, select the days of the week for this new configuration to apply.
You can select all days with one check in Select All box.
Or
Check each specific day(s) that this configuration will apply to.
Below Monday thru Friday have been selected.
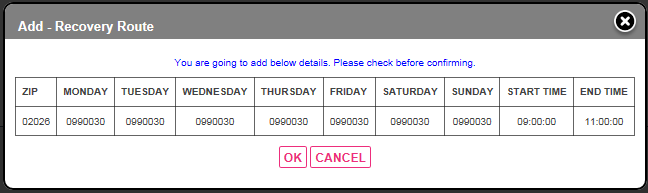
Click OK to save your entry.
Once saved, you will see a confirmation screen.
If correct, click OK.
If incorrect, you can cancel to re configure.
After confirming, you will receive a success message.
You can just Exit once you validate it is correct by clicking on the X.
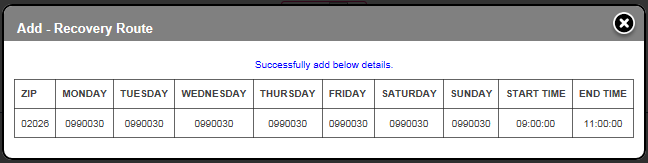
You will now see the new entry in the configuration display by zip.

This concludes the addition of a configuration in the Recovery Route Configuration Tables.
---------------------------------------------------------------------------------------------------------------------
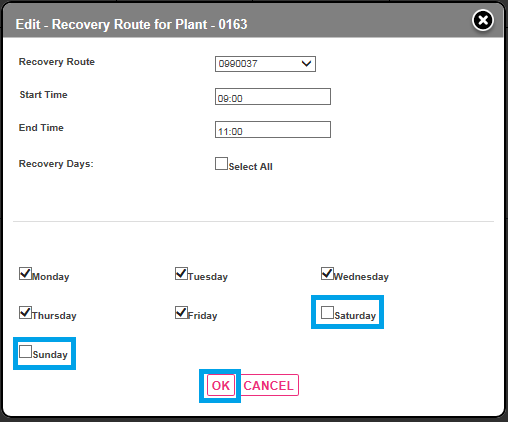
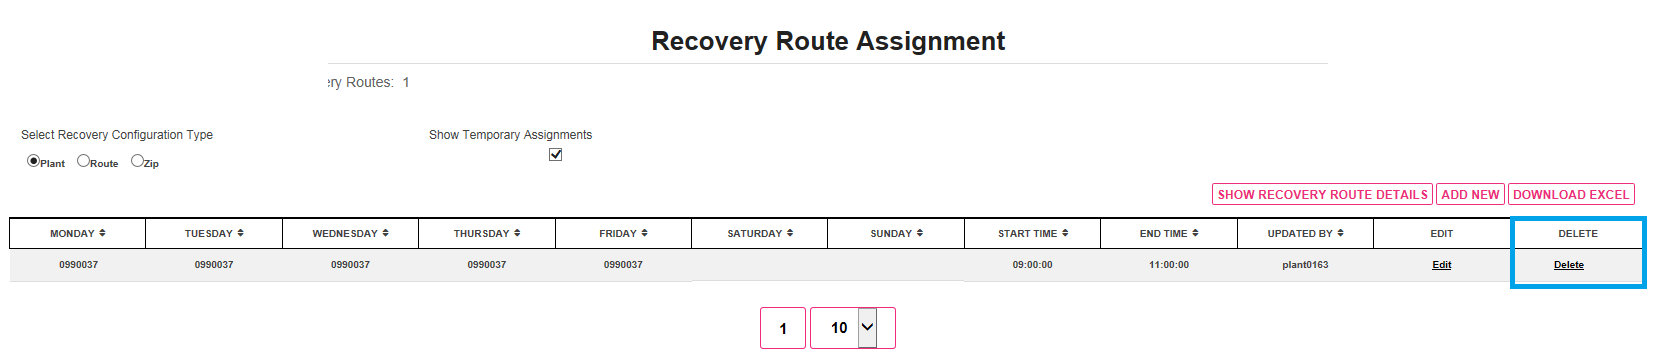
You can also EDIT or DELETE the current displayed configurations.
When displaying Plants, Routes and Zips configuration: You can make your edits, changes or delete the transaction.
After you click on edit you can adjust the days. For example, we will remove the weekend days by checking Saturday and Sunday, and clicking on OK.
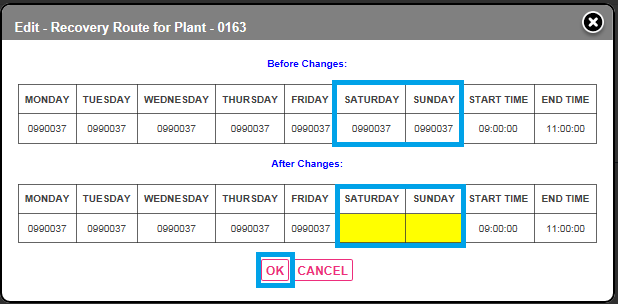
A Before Changes screen and an After Changes (highlighted entries) screen allows you to verify your choices.
If correct, click OK.
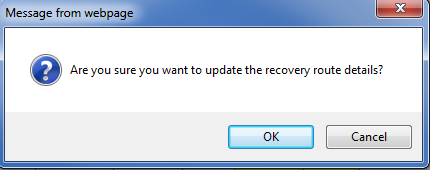
A screen displays to validate your entries.
If accurate, click OK. Last chance to cancel!
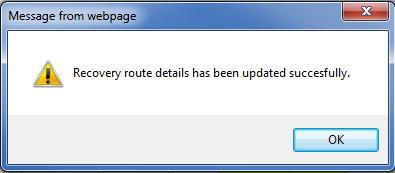
You will receive a display that the entries have been successfully updated and that nothing more will be created from this entry.
Click OK.
The Edits have been updated and now display in the full recovery route configuration.

To remove an entry in the configuration: Click on the delete.
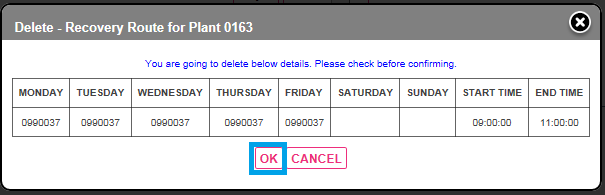
A display alerts you to what you are going to delete!
Click OK if correct. Cancel if incorrect.
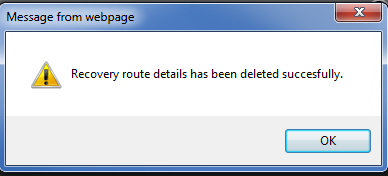
A message will confirm your entries have been deleted.
Click OK.
The plant configuration will no longer be in the Recovery Route Configuration table.
This completes the information on the Recovery Route configuration table.