From the DSP Comp menu select RATES > RATE ENTRY to edit/add or delete rates.

At the DSP Compensation Delivery Rate Entry screen, select filters to locate the entry you want to change OR find the entry that is most like the new entry you want to make. Click SEARCH.

|
Delivery Rate Type |
Select either Pay By Copy (PBC) which is standard per piece rate or Pay By Address (PBA) which is a flat rate or scaled rate of multiple copies to one location |
|
Plant |
Will default to plant of user or select from drop down if multiple |
|
Product |
Select ALL for every product or choose product /edition codes from dropdown |
|
Route |
Select ALL for all routes or choose a specific, individual route from dropdown |
|
Route Group |
ALL is the default; most plants only have one route group |
|
Delivery Type |
Select ALL or choose a specific delivery type from the dropdown |
|
Effective Date |
This is date rate is in effect; can enter past date within period or future date |
Searching by route is an easy, quick way to access rates on a route when negotiating with a prospective DSP.
Review the SEARCH RESULTS. Click DOWNLOAD to export the search results into excel for analysis, as a worksheet, or as prep for a CSV file upload.
The left side of the data shows the RATE LEVELS and details determining the criteria subject to the rates displayed on the right side.

In the above example:
Under Rate Level 40, these rates apply for all home delivery (Z1) for ALL Products on route a specified route.

Under Rate Level 30, these rates apply for all home delivery (Z1) of the specified product for ALL routes.

Under Rate Level 10, these rates apply for all home delivery (Z1) of the specified product on the specified route.

Click to put a check mark on the item(s) you want to Edit/Add* or Delete.
Adding a new line item is done by selecting a line that has like characteristics or is fairly similar to the new item. It presents a starting point to mimic.
Click Extract selected items to the Edit page.


Editing a Rate on an Existing Rate Level:
The line item or items selected for editing are isolated on the top portion of the Edit page, each line has the option to select the action you want to perform: Edit/Delete/None.

Edit - allows you to change information on a line item OR create a new Rate Level line item.

Delete – removes that Rate Level line item completely.

None – Changes you enter will not be applied to Rate Level line items where none is checked.

Regardless of how many lines you select, for each one you select Edit, the changes you make will apply to all.
The bottom portion of the screen is where you will enter the data you are changing. You only need to enter the new or different data in the appropriate fields.

Once you have entered the data you want to modify, click CHANGE.
If you want to start over, click BACK TO SEARCH RESULTS.
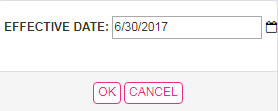
A pop up window will prompt you to enter an effective date.

Remember: You can enter any future effective date OR past dates as long as they are within the current pay period.
Click OK.
A summary window will appear with your changes highlighted so you can have a last look and review completely before moving forward with the change. Note the CONFIRM/CHANGE indicator.

Before Change: this is your starting point; this is what was already in the system.
Changes: displays the line item(s) with the changes you made highlighted.
After Changes: displays what will be in the system AFTER you confirm and save the changes. This also displays updated effective dates.
EXAMPLE:
In the After Changes section, notice there are two lines – on showing Effective To date (end date) of the original data and the other showing the modifications and the new Effective From (start date) for the changes.
If something is wrong, you have the option to click RESET ALL and start over.
Once you have reviewed the changes and are confident they are correct, select CONFIRM AND SAVE ALL
A pop up window will confirm your change. Click OK.
Deleting a Rate level line item:
Search and select the line item(s) you want to delete; EXTRACT SELECTED ITEMS TO THE EDIT PAGE.

Select DELETE then click CHANGE.
A pop up window will prompt you to enter an effective date.

Remember: You can enter any future effective date and past dates as long as they are within the current pay period.
Click OK.
A summary window will appear with your changes highlighted so you can have a last look and review completely before moving forward with the change. Note the CONFIRM/CHANGE indicator will say DELETE.

If you don’t want to delete, click RESET ALL to cancel the transaction.
Once you have reviewed the changes and are confident they are correct, select CONFIRM AND SAVE ALL
A pop up window will confirm your change. Click OK.
Adding a rate level line item:
When adding a new Rate Level line item, you are adding another element of complexity to the structure and therefore another layer of complexity for you to maintain.
Before adding a Rate Level line item, think through what you are trying to achieve and use the search filters to see that the Rate Level and criteria do not already exist.
Adding rate level line items involves editing data on the left side of the Rate Entry search results which shows the RATE LEVELS and the details determining the criteria subject to the rates displayed on the right side.
Choose an Existing Line Item.
If you are ready to proceed adding a Rate Level line item, then select an existing line item that closely matches the line item you want to create and EXTRACT SELECTED ITEMS TO THE EDIT PAGE.
Use drop downs (Route Group, Delivery Type, Product, and Route) to select the new criteria for the line item that is different from the one originally selected.

IN THIS EXAMPLE:
The line item originally selected, Rate Level 30 has all routes being paid the same rates for home delivery of product BBWK.
We have decided to make an exception for route 0435SW01, paying that single route a slightly higher rate.
Select the route from the dropdown, enter the new rate in the appropriate day(s).

Click Change. Effective date window pops up. Click OK.

A summary window will appear with your changes highlighted so you can have a last look and review completely before moving forward with the change. Note the CONFIRM/ADD indicator.

The After Changes section shows the original Rate Level selection still in effect with no changes highlighted AND the new entry you created with changes highlighted. In this example the line items is assigned a Rate Level 10 based on the specific criteria you selected.
CONFIRM AND SAVE new entry.
If you don’t want to add the new Rate Level line item, click RESET ALL to cancel the transaction.
Once you have reviewed the entry and are confident you want to proceed, select CONFIRM AND SAVE ALL.
A pop up window will confirm your change. Click OK.