
The Filter, allows you to target a specific DSP using the DSP ID or Name and/or address.
Enter your specific information, and click on the Filter button.
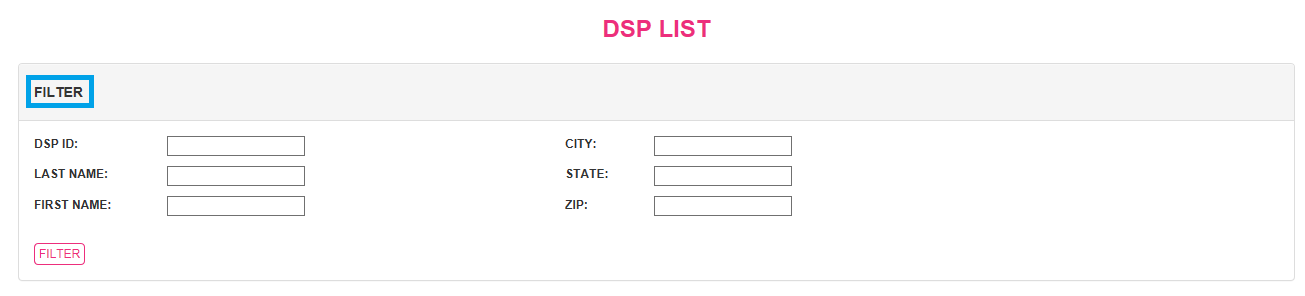
Your specified information will display in the appropriate section based on the status of the DSP.
If the DSP is active they will display in the ACTIVE DSP’S section.
If the DSP is inactive they will display in the INACTIVE DSP’S section.
From the Active DSP’S list, you can either View/Edit DSP or assign route to a DSP.

The VIEW/EDIT allows you to terminate a DSP or update a DSP’s name, address and phone number.
To Terminate a DSP click on the Select button under the View/Edit DSP heading.
Click on the Radio Button Terminate DSP. Then enter the last date the DSP will be on the route.
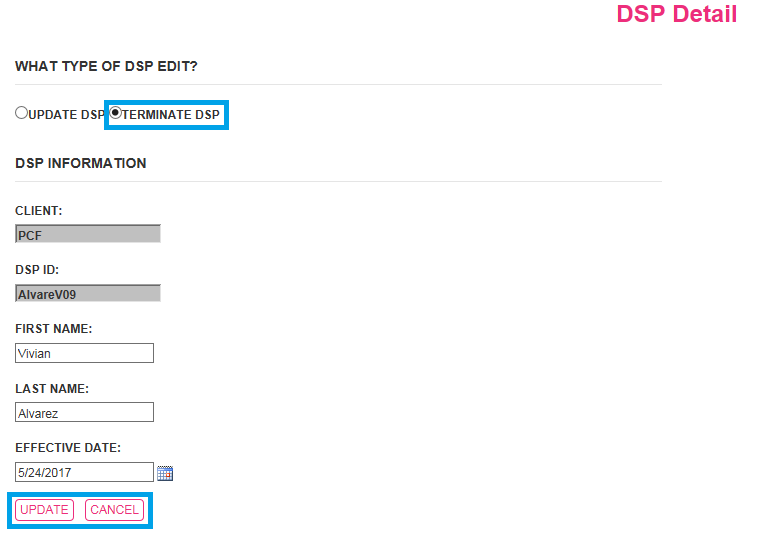
Reminder: Date has to be Yesterday or a future date.
Warning: You cannot terminate a DSP if they are assigned to a route as shown in the screen shot below.
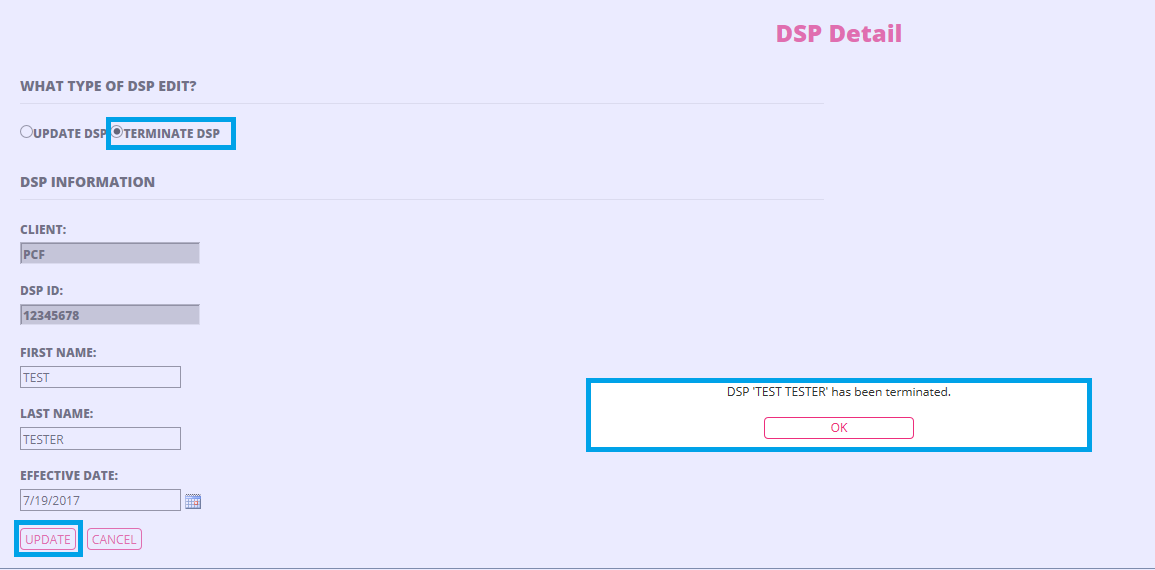
Click on UPDATE or CANCEL to complete this action.
If updating you will receive a message box confirming that the DSP has been terminated.
If canceling, you will return to the original DSP Lists with no changes made. Cancel doesn’t complete the action.
Click Ok.

The DSP will now display in the Inactive DSP’S list.
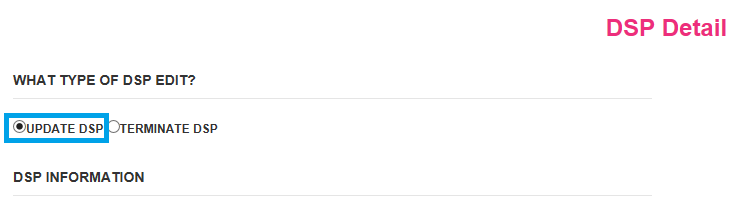
From the Active DSP’S list you can update a DSP’S information:
Click on SELECT under the View/Edit DSP heading and click on the radio button Update DSP. Enter the changes needed then enter the effective date.
Reminder: Date has to be Yesterday or a future date.
Click UPDATE to save the changes.
From the Active DSP’S list you can
assign an active DSP to a route.
Click on the Assign button for the specific DSP under the Assign Route heading.

Reminder: Assigning a DSP to a route here will bypass EContracting.
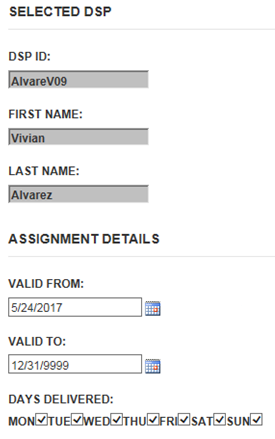
Enter the valid from date.
Reminder: Valid from date has to be set to Yesterday or up to a Month in the future.

Enter a check mark for each Days Delivered.

From Filter, enter a specific route and click on FILTER or Click on SHOW ALL to display all available routes.
Enter a check mark next to the route that the DSP will be assigned to.
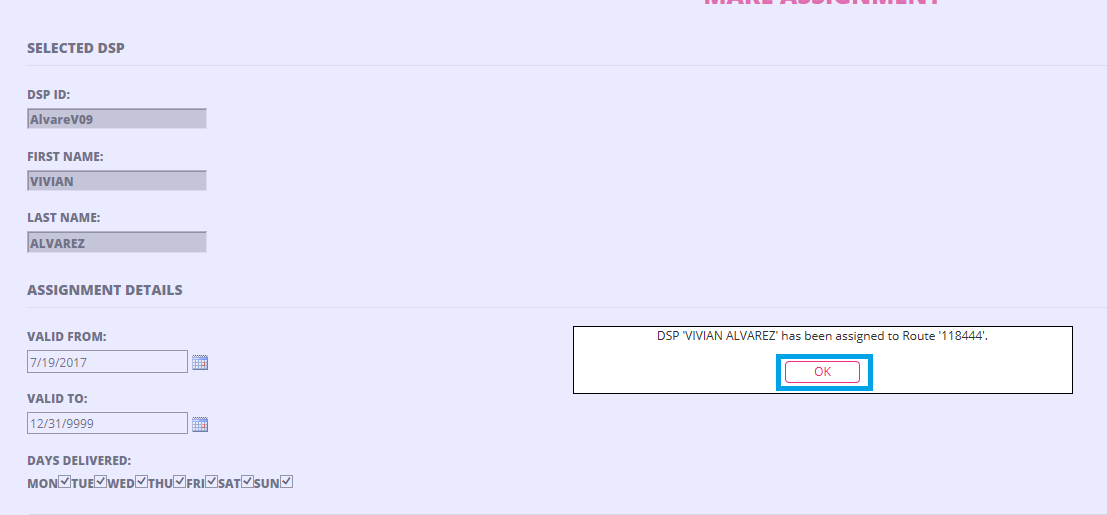
Next click on the Assign Route button.

You will receive a white box with a confirmation that the DSP has been assigned to the selected route.
Click OK.
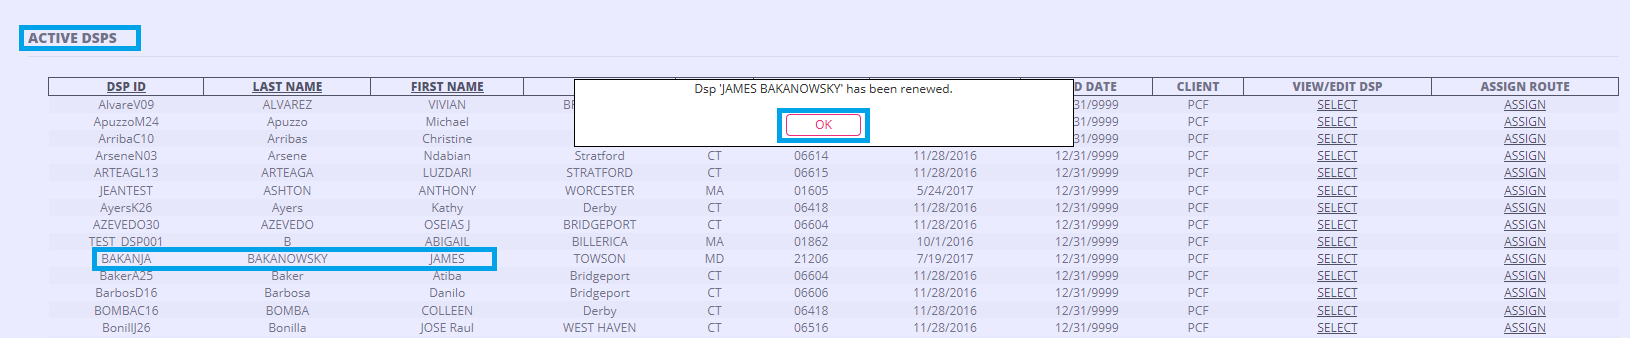
From Inactive DSP list you can renew or activate a DSP.

Click on the Renew DSP button.
A message box will display that the DSP has been renewed.
Click OK to complete the renewal.
The DSP will now display in the Active DSP’S list.
DSP ID Edit Feature:
DART will now allow you to update an existing DSP ID.
Log into DART and go to the Administration Menu < DSP Administration < Maintain

After landing there you will have the option of choosing which DSP you would like to edit. After finding the correct DSP press the Select option under the View/Edit DSP column for that DSP.

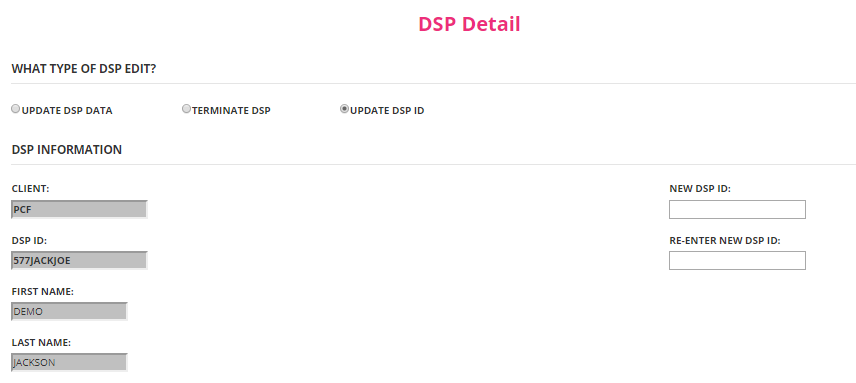
When you land on the DSP Detail page you will now see three options to choose from: Update DSP Data, Terminate DSP, and Update DSP ID. The first two option you should already be familiar with. This will guide you on how to use the Update DSP ID option.
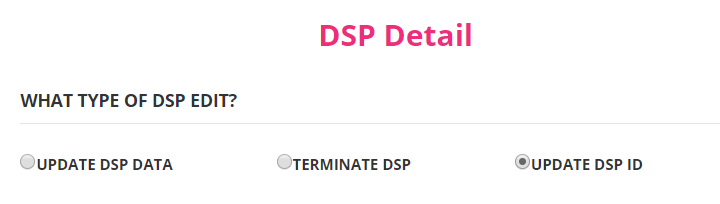
This option will only allow you to update an existing DSP’s ID.
Follow the options for the two boxes. Add the new information to the New DSP ID field and the Re-enter New DSP ID field then click on the update box.
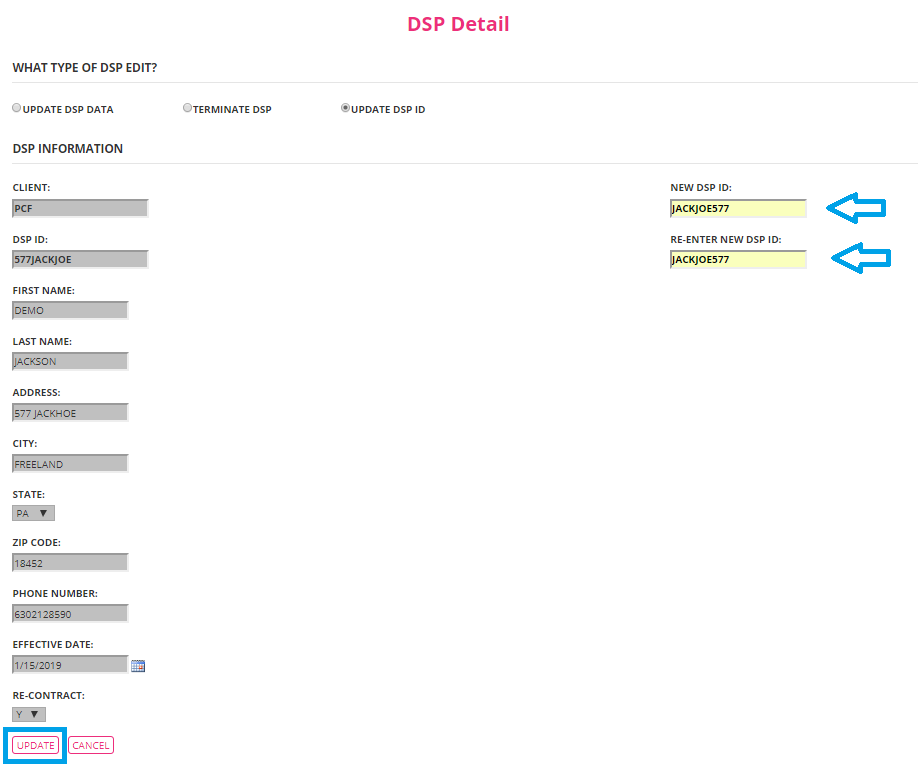
You will now get a new box that will tell you that you successfully updated the DSP ID.

After clicking on the OK on the box the system will return to the Maintain page and you can now see the new DSP ID listed with the DSP that you updated.

In the example that we just walked through you can see that the DSP ID for Joe Jackson was changed from 577JACKJOE to JACKJOE577.
*Note: If the DSP already has a Mobile/Portal account, nothing needs to be done after updating the DSP ID, it will continue to work just as it always has.